I have recently taken the plunge and jumped on the kickstarter wagon for the first time.
I successfully backed up a project called Kello.
And after months of anticipation, I finally received the product: a smart alarm clock:

Kello
Now not only does this alarm look good, but it’s also WiFi and IFTTT enabled and for me that was the major sales point. The plan was to integrate it with my automation setup.
I’ve only had it for about a month and already I’m really impressed with its prowess. The first thing I did was to connect it to IFTTT.
At the time of writing IFTTT is only a beta feature access needs to be requested ([email protected]). They are really responsive and I was granted access within 24h via the use of the TestFlight app on iOS
IFTTT integration currently offers 4 triggers:
alarm_start: triggers when an alarm starts ringing.alarm_snooze: triggers when you press snooze.alarm_stop: triggers when you stop the alarm.alarm_soon_-1440, ..., alarm_soon_-120, alarm_soon_-6: the number on the right is the number of seconds before the alarm rings. Only use multiples of 60, up to 1440 seconds (24 minutes) before the alarm rings.
The other interesting bit is that the device can programatically be made to play online content with a one line piece of code:
printf "\n0p41uri:http\:\/\/cdn.us1.sunup.co\/files\/music\/sounds\/fireside.ogg\r" | nc 192.168.x.x 4444
The URL can be adjusted to play any online content (I’ve not tested all formats). The IP address needs to be the Kello’s IP address (best to set it to static on your router’s DHCP settings)
Armed with the above, I wanted to adjust my weather greeting script so as to play the audio on the Kello. The idea is to have the Kello play its set alarm sound to wake me up, then when I stop the alarm, a rule is triggered to play the weather forecast for the day (I pressed the stop button so I’m awake enough to pay attention to the forecast)
Here is how I did it.
- IFTTT:
- Go to http://www.ifttt.com/maker_webhooks.
- Press on the gear icon on the top right of your screen.
- Copy your webhook ID (the text after ‘http://make.ifttt.com/use/’).
- Home Assistant:
- Add the IFTTT integration to your configuration:

- Don’t forget to copy/save your webhook URL, you’ll need this later
- Add a new shell command to your configuration.yaml file. Replace the IP with your Kello’s IP address and replace the URL with the address of the weather forecast sound file you want to play (this is created and uploaded separately)
shell_command:
weather_on_kello: printf "\n0p41uri:http\:\/\/cdn.us1.sunup.co\/files\/music\/sounds\/fireside.ogg\r" | nc 192.168.x.x 4444
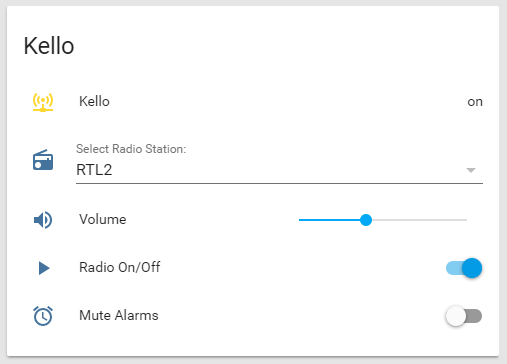
- Kello App:
- Go to the settings.
- Press ‘IFTTT’.
- Paste your webhook ID.
- IFTTT:
- Create a new Applet.
- For the if THIS condition, choose Webhooks.
- Click on Receive a web request
- For the Event Name, choose one of the event as listed earlier on. I chose
alarm_stop
- Click on Create trigger
- For the then THAT action, choose Webhooks.
- Click on Make a web request
- Enter the following details:
- URL: your Home Assistant IFTTT Webhook (you will get this when you setup the IFTTT Integration in HA, see 2.1 above)
- Method: POST
- Content Type: application/json
- Body: { “action”: “somekeywordgoeshere”}
- Click on Create action
- Home Assistant Automation:
- Create a new automation. The needed trigger will be:
  trigger:
    - platform: event
      event_type: ifttt_webhook_received
      event_data:
        action: somekeywordgoeshere
(*): To be able to receive events from IFTTT, your Home Assistant instance needs to be accessible from the web. This can be achieved by forwarding port 8123 from your router to the device running Home Assistant.
My next “project” is to mute or stop an alarm from playing if for any reason I’m not home so I don’t disturb anyone. Check this post to see how I did it