Welcome to my site. I purchased a Raspberry Pi in the middle of 2012 when it came out. At first, I really bought it as a gadget, not really knowing what I’d do with it, but it really grew on me so I decided to keep a blog of my experiences with it.
The ultimate goal was for the Raspberry Pi to be the brain of an home automation setup. A lot has changed since then, with many components added or replaced, but the beloved Raspberry Pi still holds a central role and importance in my ever changing setup.
I’ll try and update this blog with any major update or addition, with as many details and references as possible, but feel free to poke me if you need any more details on a specific iteration.
I hope you enjoy reading this as much as I enjoyed writing it.
Happy reading!
Ubuntu lists USB devices by default under /dev/ as ttyUSBx where x is a number starting 0. Issue with this is if USB devices are swapped to a different port, it’s not clear with ttyUSBx device relates to which physical USB device.
There are a few ways to change settings to point to the correct USB Device. I’ll list to 2 most common ways. The below is an examples for an RFXTrx433 USB Transceiver, but the process works the same for any other USB device.
Option A
Point the app to the device’s serial id. Run this in a terminal:
ls /dev/serial/by-id/
This will list all serial USB devices. Pick the one that you need to communicate with and set its address in your app, e.g.
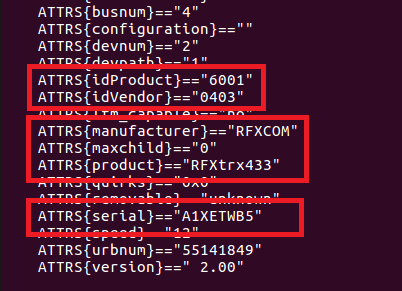
udevadm info -a -p $(udevadm info -q path -n /dev/ttyUSB0)
(if necessary replace ttyUSB0 with ttyUSB1)
You need to locate the block where it gives you the correct value for your device, ATTRS{manufacturer} and/or ATTRS{product} and take note of the ATTRS{idVendor}ATTRS{idProduct} and ATTRS{serial}:
Edit the following file with your preferred editor: /etc/udev/rules.d/99-usb-serial.rules and add this line:
Replace the values in ATTRS{idVendor}ATTRS{idProduct} and ATTRS{serial} with the ones you found in previous step, replace RFXTrx433 with a name that makes sense to you. Save and Exit
Run this in a terminal:
sudo udevadm control --reload && sudo udevadm trigger
You should then have a new device listed in /dev matching the name you provided after SYMLINK. To confirm, run this in terminal:
ls /dev/RFX*
(replace RFX with the name you provided after SYMLINK)
Enter the device’s “new” address in your app, e.g.
/dev/RFXTrx433
Now it does not matter which USB port your device is connected to, it will always be found.
Now it is possible to simply “swipe” a hand above the light to turn it on or off, and it also updates its status on MQTT so Home-Assistant can be updated too.
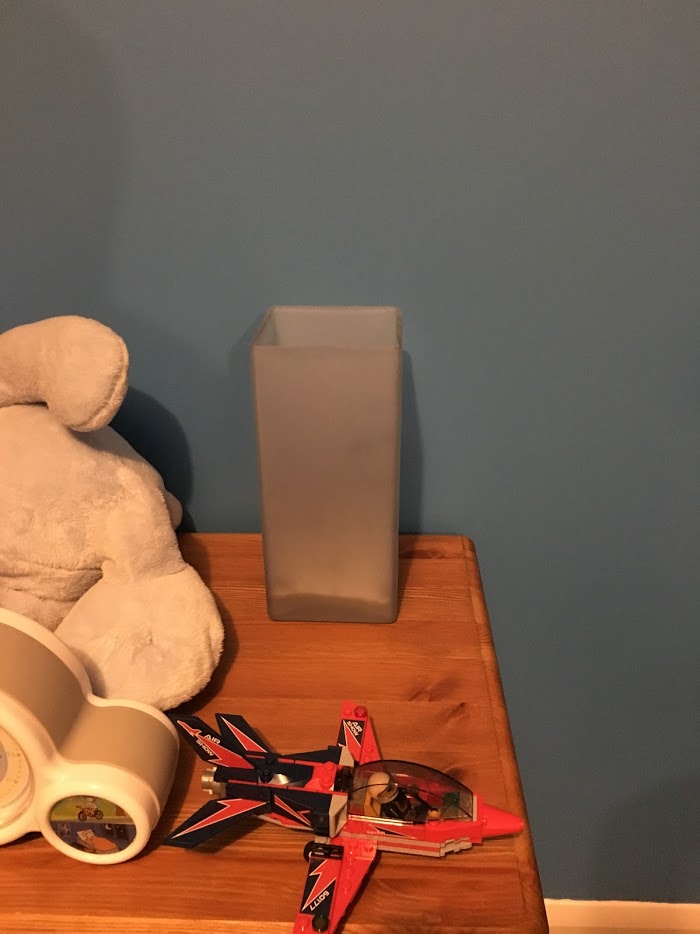
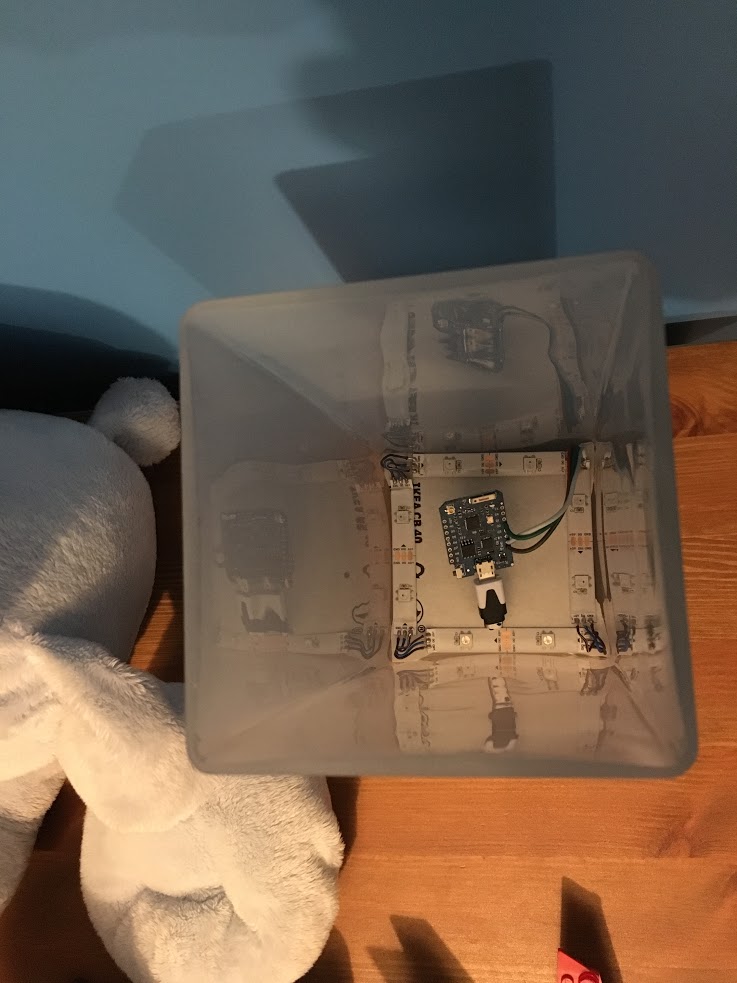
I have long been looking for a way to add a light in my son’s bedroom to try and teach him to stay in bed until it’s morning. I’ve seen many clocks that give a different colour for sleep and it’s ok to wake up times, but they were too “childish”. Also they’re all “dumb” in that the time is not synced so I’d have to adjust the time every so often (at the very least twice a year as daylight saving changes)
I also wanted a way to be able to set a different time in the weekend.
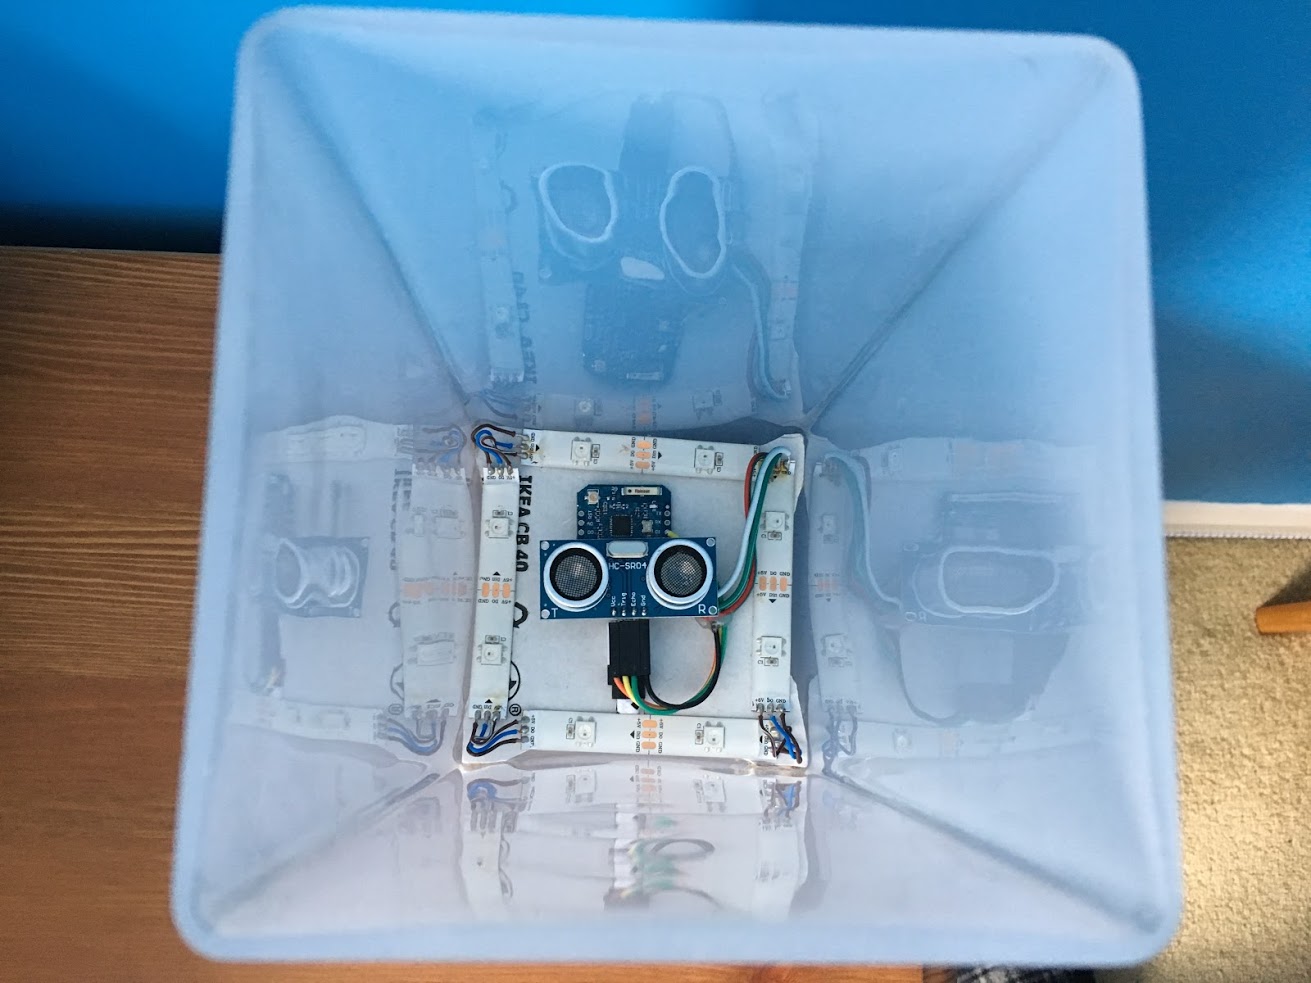
By this stage I’m actually thinking of building a lamp with some of the LED Strips leftovers I have from past projects with a WeMos D1 Mini Pro. I ended up doing just that.
The only thing I needed was something to put the LED strip in that would look ok.
I thought the IKEA GRÖNÖ would be a perfect candidate. Plus at £6 it’s rather inexpensive.
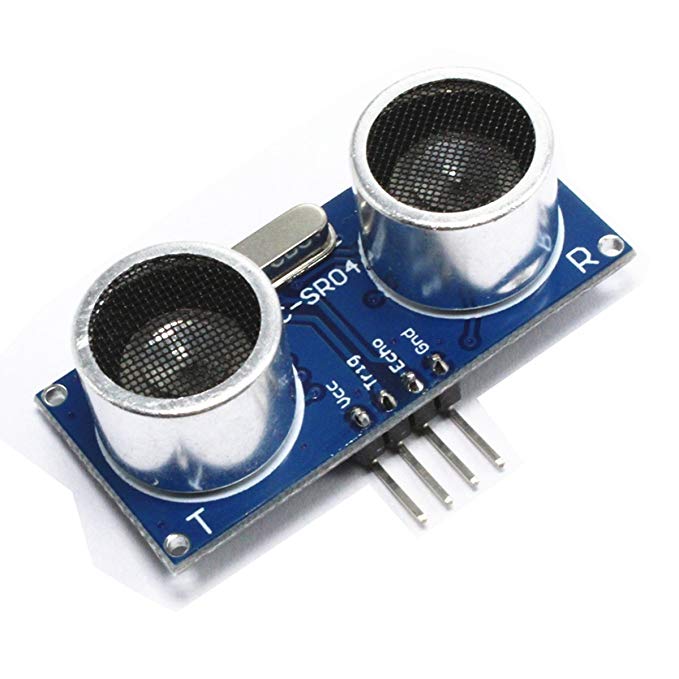
The Arduino code is pretty much the one i used for the Conservatory LED Strips though there are only 8 LEDs to control. It’s still not finished as I want to add an ultrasonic sensor to allow anyone to turn it on without needing access to Home-Assistant, but for now, here is how it looks:
So I’m still on Ubuntu 16.04, and from version 0.65, Home-Assistant.io now needs Python 3.5.3 or later to run.
Issue is, by default Ubuntu 16.04 only goes up to Python 3.5.1.
I can update to 3.6 but ran into backwards compatibility issues. So I thought this would be a good excuse/opportunity to try Docker.
And my oh my is it awesome. No need to worry about any prerequisites, it takes care of everything that’s needed to run HA. It also means updating and downgrading HA is a breeze.
Only issue I’ve seen so far is that the python scripts that I have running to update some of HA’s devices no longer work as they use libraries that aren’t installed in HA’s docker. I looked at a few options but ended up moving them completely out of HA and having them publish on MQTT instead of interacting with HA directly.
Moving scripts to communicate via MQTT also means that should I lose internet connection, my HA instance will keep updating as I’m not attempting to connect out and back via HTTPS.
I’ve already added InfluxDB and Grafana on Docker and I use Portainer to manage it all, I’m now planning on moving other apps to docker (Plex, WordPress, OpenALPR, etc)
Finally I use docker-compose instead of docker run to launch my containers, it’s easier to manage all options and means I don’t need a separate bash file to launch each container. Here’s the container I use for HA, InfluxFB and Grafana:
I’ve recently discovered OpenALPR and I’m really impressed by it.
OpenALPR is a software that performs Automatic Licence Plate Recognition (Hence ALPR) from a video stream. The free account is quite basic as it does not offer alerts, but it still allows plate recognition and saves them as well as the actual picture for a few days.
And this is how impressive it is at recognizing plates:
OpenALPR Full Image
OpenALPR Console
It appears to be quite resource hungry though (well my camera’s resolution is 3072 x 1728 !) so I’ve only got 1 camera fed through the agent now. I’m planning on trialling another agent on a raspberry pi and see how it copes…
[EDIT – 16th Aug 2018]
Turns out a Raspberry Pi would not be strong enough to cope, or so that’s what the people at OpenALPR say… 🙁
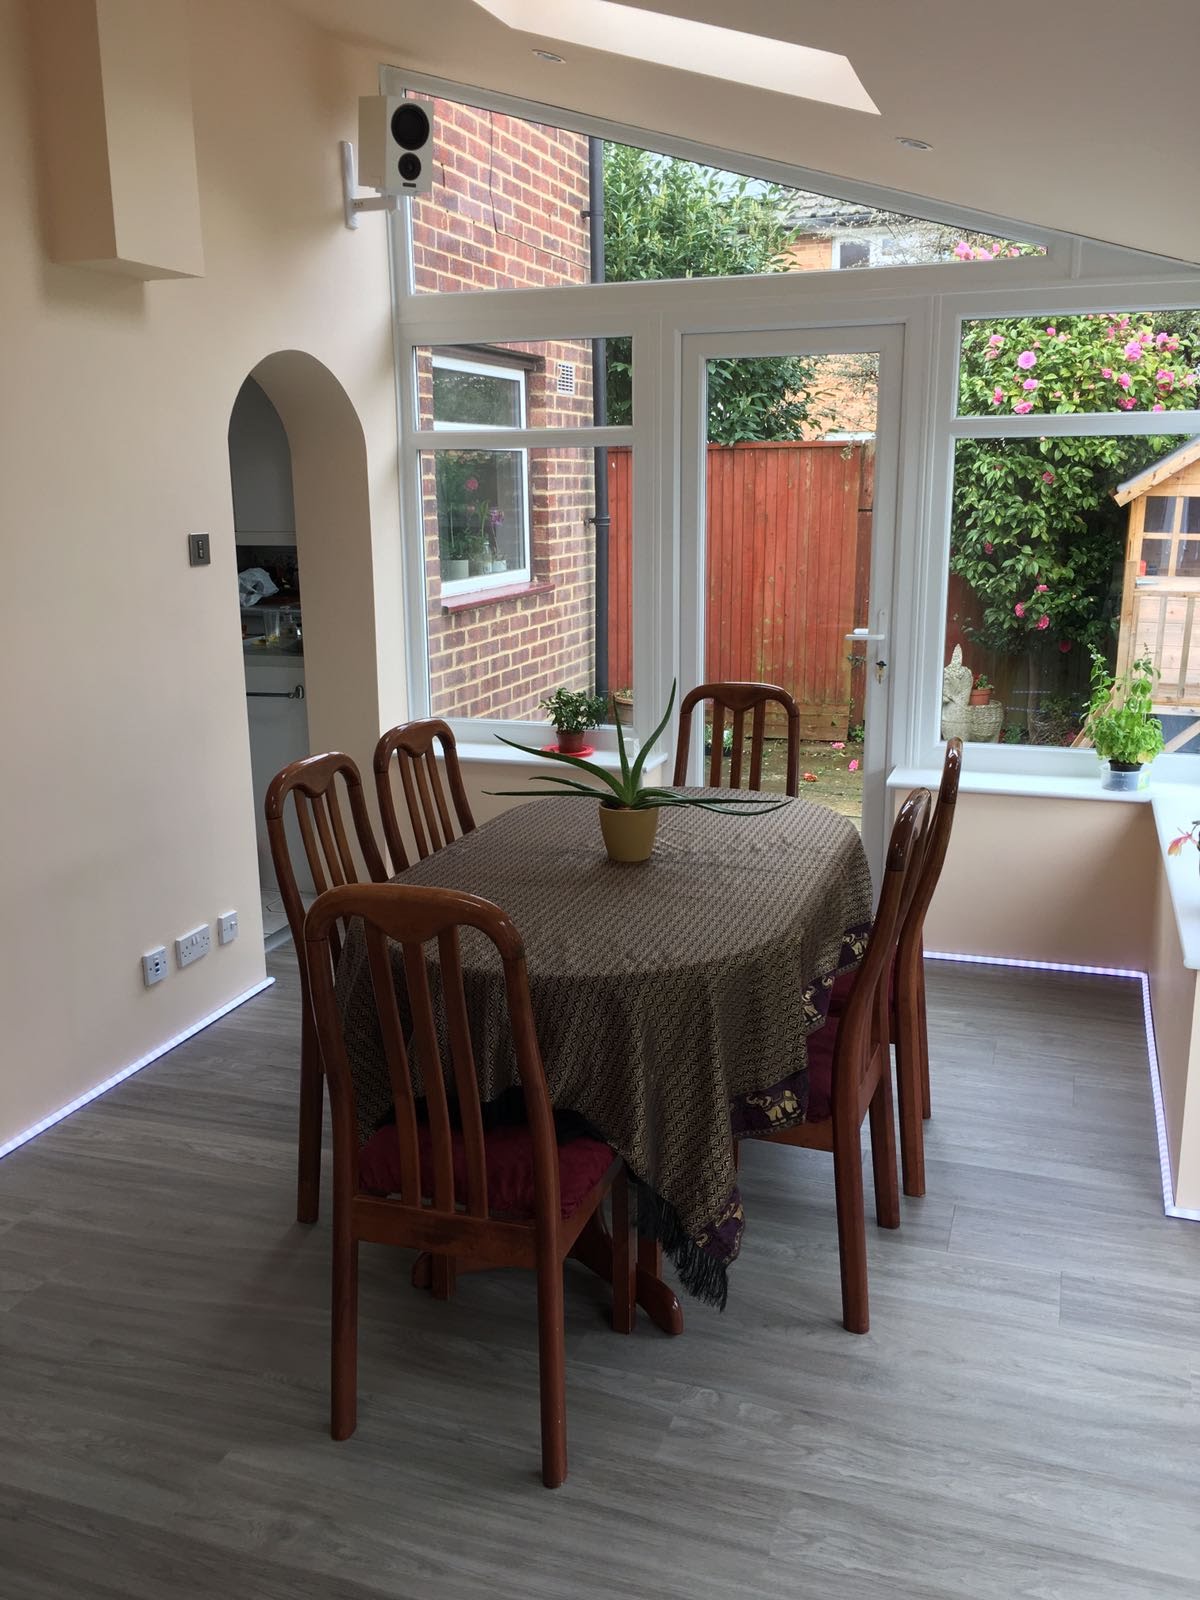
So I’ve had the old Conservatory removed and a new one put in place. Well I still refer to it as a conservatory, but with a solid roof and a dwarf wall, it’s more an extension than a conservatory.
Anyway, technicalities aside, I wanted to ensure the conservatory would fully integrate with my Home-Assistant setup, so here is a summary of the things I did:
Installed a LightWaveRF smart switch so I can control the lights from HA
Ran speaker cables through the wall before plastering to have a set of speakers that I connected to my Onkyo TX-NR656 AV
After laying the floor down, I decided not to use a standard scotia and instead fitted aluminum profiles with an LED strip.
The LightWaveRF switch was a no brainer to install and configure, so I’ll just skip straight to the next section
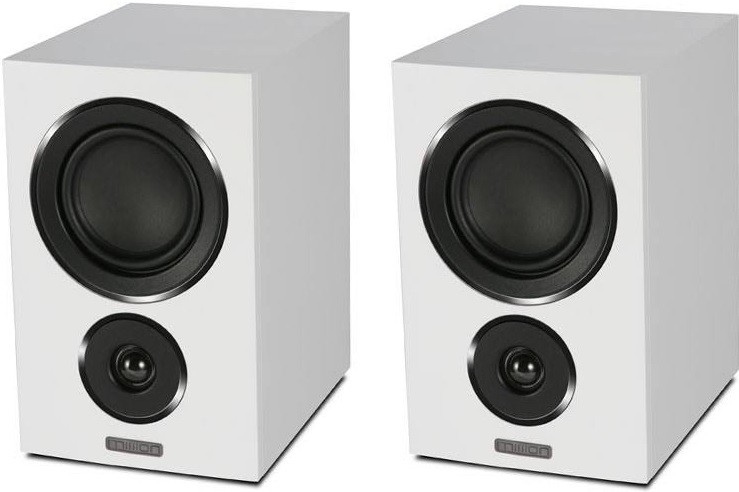
The Speaker cables were no issues either, and I connected them to a pair of Mission LX1 white speakers. They actually sound a lot better than I thought they would.
Mission LX1 Speakers
I connected them to the Zone 2 of my AV. First thing I noticed straight away is that although the AV has a Google Cast built-in feature, you cannot cast to both Main and Zone2 simultaneously, which is a shame. I connected a spare ChromeCast Audio to the AV and that did the trick.
Now for the pièce de résistance, the LED Strip scotia. I didn’t want a bog standard scotia or skirting boards, I was looking for something a bit more… fancy. I therefore bought some LED strip profiles and taped an LED strip to it. I decided for a WS2812B LED Strip type instead of 5050 so I could control each individual LED independently in order to have some nice effects. I used the code from Bruh Automation to get started and loaded the code on a WeMos D1 Mini Pro.
Here is an example of what can be achieved with such an LED Strip:
This actually took much longer than I thought, mainly because I had to run a pair of power cables through the profile and feed power to the LED strip every 4-5 meters or so to ensure it would stay bright enough.
I’m really pleased with the end result however:
And of course everything can be controlled from HA or my Google Home Mini 😎
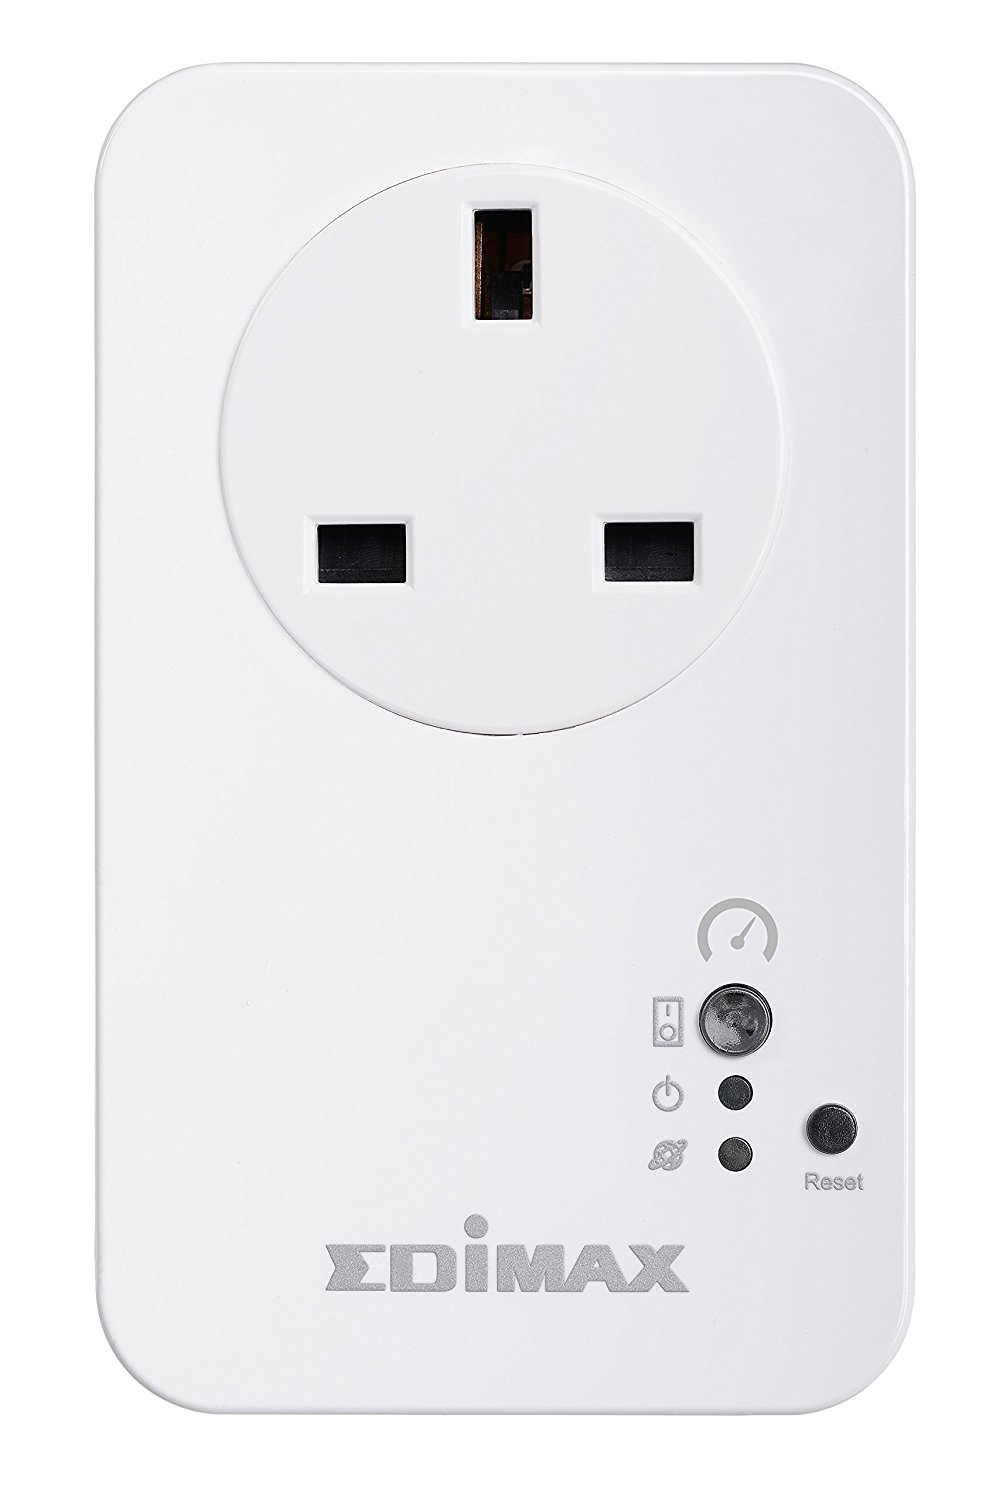
I saw this little plug on Amazon recently and decided to add it to my “arsenal” of gadgets.
Edimax SP-2101W
The interesting bit about it is that not only it can be remotely controlled, but it also provide energy monitoring, so you know if the “dumb” appliance that’s connected to it is on or off.
I’ve connected my kettle to it as a test, and I think it might stay there for a while now.
Thanks to C4rtm4N I now have the status of my Sky+ HD box in Home-Assistant. When used in conjunction with dalhundal‘s sky-remote-cli it becomes close to a fully fledged solution.
Playback or Live TV is now automatically paused if the Sky+HD box is on…
The code I used (for now, there appears to be times when it generates errors in HA) is:
sky_hd_power: sky-remote-cli sky_ip_address power
sky_hd_pause: sky-remote-cli sky_ip_address pause
of course replace the ip addresses with that of the Sky box (which should be fixed by your router). You’ll need to ensure sky_remote_cli is installed of course:
npm install -g sky-remote-cli
Head over to dalhundal‘s page for more info on sky-remote-cli…
I’ve been using the excellent cloudmqtt since my early days getting to know MQTT. It’s been flawless except for about 3-4 times this month where it failed and I had to contact cloudmqtt support. Now I have to praise the support team as they did an excellent job very quickly, but the few faults made me think it was time to get myself my own broker.
In addition to going away from potential third party failures, it would allow me to keep controlling my devices should I have any internet access issues.
So I followed this page to set up mosquitto on my server.
Once done, I didn’t want to just switch everything over from cloudmqtt to mosquitto as I have quite a few devices to connect to cloudmqtt, some less accessible than others. I therefore created a bridge between my mosquitto and cloudmqtt to get the best of both worlds.
This was done by a new mosquitto config in the` /etc/mosquitto/conf.d/ directory`, I used cloudmqtt.conf (it can be any name as long as it ends with .conf so mosquitto will read it) with the following info:


