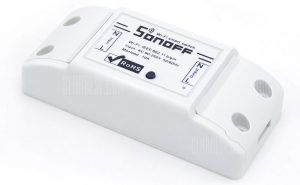
I found this cheap smart WiFi switch on one of my favourite Chinese sites: the Sonoff Basic:
And I thought: for a fiver, I’m not risking much, and it can supposedly be re-flashed with MQTT which I’ve grown found of recently (see Smart Christmas Baubles or Back-lit House Number if you want to know why).
Once received, I saw that indeed there was a header that could be used to flash the firmware. After a bit of search and from some of my readings on the Home-Assistant community site, I settled on the Tasmota firmware.
Now I have to say, at first the Tasmota Github website is quite daunting and complex, bit of a case of too much information kills information, but I eventually managed to get through it.
As I’m using Arduino IDE, I’ll trace the steps I had to follow in case someone else like me is a bit stuck.
First of all, I had to solder header pins on the Sonoff board to connect it to a PC and upload the new firmware. You’ll find everything you need to know in here
Then there were a few things that I had to do aside from downloading the code off Github. Now I have to plea guilty a bit as I simply downloaded the latest version and tried straight away. I say “guilty a bit” as it wasn’t obvious at first that there were more steps to follow when using Arduino IDE. So it’s worth following them else you may get the same error as I did: `MQTT_MAX_PACKET_SIZE is too small in libraries/PubSubClient/src/PubSubClient.h, increase it to at least 1000`
So here is the info: Arduino IDE
Once all that is done, flashing is a bit of a breeze (though I had to swap the RX and TX connectors on my 3.3V FTDI USB-to-Serial Programmer else it would fail to connect)
Once flashed, it was very easy to add it to Home-Assistant, especially when following info from the Github
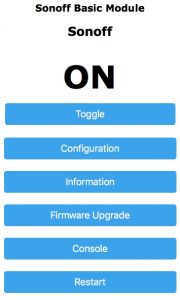
Best of all is the control page when browsing to the Sonoff’s IP address:
I will definitely get more of these switches at this price.
My next project will be to add a DHT12 to it as it’s possible to wire one directly to the GPIO14 (on the header so easy) to add temperature and humidity data…


