Category Archives: Home-Assistant

Smart IKEA GRÖNÖ Lamp – Take 2

Following my first iteration of the IKEA GRÖNÖ Lamp, I wanted it to be a bit… well less smart?

It’s all working well and good, but if one wants to turn the light on or off, one needs to open the Home-Assistant app/website to control it.

I wanted to add way to allow the light to be manually turned on/off if needed.

So I decided to use a spare HC-SR04 Ultrasonic sensor.

HC-SR04

HC-SR04

Now it is possible to simply “swipe” a hand above the light to turn it on or off, and it also updates its status on MQTT so Home-Assistant can be updated too.

IKEA-GRONO-HC-SR04

IKEA-GRONO-HC-SR04

The code can be downloaded from my github


Smart IKEA GRÖNÖ Lamp

I have long been looking for a way to add a light in my son’s bedroom to try and teach him to stay in bed until it’s morning. I’ve seen many clocks that give a different colour for sleep and it’s ok to wake up times, but they were too “childish”. Also they’re all “dumb” in that the time is not synced so I’d have to adjust the time every so often (at the very least twice a year as daylight saving changes)

I also wanted a way to be able to set a different time in the weekend.

By this stage I’m actually thinking of building a lamp with some of the LED Strips leftovers I have  from past projects with a WeMos D1 Mini Pro. I ended up doing just that.

The only thing I needed was something to put the LED strip in that would look ok.

I thought the IKEA GRÖNÖ would be a perfect candidate. Plus at £6 it’s rather inexpensive.

The Arduino code is pretty much the one i used for the Conservatory LED Strips though there are only 8 LEDs to control. It’s still not finished as I want to add an ultrasonic sensor to allow anyone to turn it on without needing access to Home-Assistant, but for now, here is how it looks:

Lamp - Off

Lamp – Off

Lamp - Inside

Lamp – Inside

Lamp - Blue

Lamp – Blue


Moving Home-Assistant to Docker

So I’m still on Ubuntu 16.04, and from version 0.65, Home-Assistant.io now needs Python 3.5.3 or later to run.
Issue is, by default Ubuntu 16.04 only goes up to Python 3.5.1.
I can update to 3.6 but ran into backwards compatibility issues. So I thought this would be a good excuse/opportunity to try Docker.

And my oh my is it awesome. No need to worry about any prerequisites, it takes care of everything that’s needed to run HA. It also means updating and downgrading HA is a breeze.

Only issue I’ve seen so far is that the python scripts that I have running to update some of HA’s devices no longer work as they use libraries that aren’t installed in HA’s docker. I looked at a few options but ended up moving them completely out of HA and having them publish on MQTT instead of interacting with HA directly.

Moving scripts to communicate via MQTT also means that should I lose internet connection, my HA instance will keep updating as I’m not attempting to connect out and back via HTTPS.

I’ve already added InfluxDB and Grafana on Docker and I use Portainer to manage it all, I’m now planning on moving other apps to docker (Plex, WordPress, OpenALPR, etc)

Finally I use docker-compose instead of docker run to launch my containers, it’s easier to manage all options and means I don’t need a separate bash file to launch each container. Here’s the container I use for HA, InfluxFB and Grafana:

version: '3'
  services:

    influxdb:
      image: influxdb:latest
      container_name: influxdb
      ports:
        - "8086:8086"
      volumes:
        - /NAS/influxdb:/var/lib/influxdb
      restart: always

    grafana:
      image: grafana/grafana:latest
      container_name: grafana
      ports:
        - "3000:3000"
      volumes:
        - /NAS/grafana:/var/lib/grafana
      links:
        - influxdb
      restart: always

    homeassistant:
      container_name: hass
      image: homeassistant/home-assistant:0.75.3
      volumes:
        - /home/cctv/docker_ha:/config
        - /etc/localtime:/etc/localtime:ro
        - /home/cctv/docker_ha/shell_scripts:/shell_scripts:ro
      devices:
        - /dev/serial/by-id/usb-RFXCOM_RFXtrx433_A1XETWB5-if00-port0:/dev/serial/by-id/usb-RFXCOM_RFXtrx433_A1XETWB5-if00-port0
      depends_on:
        - "influxdb"
      restart: always
      network_mode: host


New Smart (?) Conservatory

So I’ve had the old Conservatory removed and a new one put in place. Well I still refer to it as a conservatory, but with a solid roof and a dwarf wall, it’s more an extension than a conservatory.

Anyway, technicalities aside, I wanted to ensure the conservatory would fully integrate with my Home-Assistant setup, so here is a summary of the things I did:

  1. Installed a LightWaveRF smart switch so I can control the lights from HA
  2. Ran speaker cables through the wall before plastering to have a set of speakers that I connected to my Onkyo TX-NR656 AV
  3. After laying the floor down, I decided not to use a standard scotia and instead fitted aluminum profiles with an LED strip.

The LightWaveRF switch was a no brainer to install and configure, so I’ll just skip straight to the next section

The Speaker cables were no issues either, and I connected them to a pair of Mission LX1 white speakers. They actually sound a lot better than I thought they would.

Mission LX1 Speakers

Mission LX1 Speakers

I connected them to the Zone 2 of my AV. First thing I noticed straight away is that although the AV has a Google Cast built-in feature, you cannot cast to both Main and Zone2 simultaneously, which is a shame. I connected a spare ChromeCast Audio to the AV and that did the trick.

Now for the pièce de résistance, the LED Strip scotia. I didn’t want a bog standard scotia or skirting boards, I was looking for something a bit more… fancy. I therefore bought some LED strip profiles and taped an LED strip to it. I decided for a WS2812B LED Strip type instead of 5050 so I could control each individual LED independently in order to have some nice effects. I used the code from Bruh Automation to get started and loaded the code on a WeMos D1 Mini Pro.

Here is an example of what can be achieved with such an LED Strip:

This actually took much longer than I thought, mainly because I had to run a pair of power cables through the profile and feed power to the LED strip every 4-5 meters or so to ensure it would stay bright enough.

I’m really pleased with the end result however:

And of course everything can be controlled from HA or my Google Home Mini 😎


Sonoff Basic

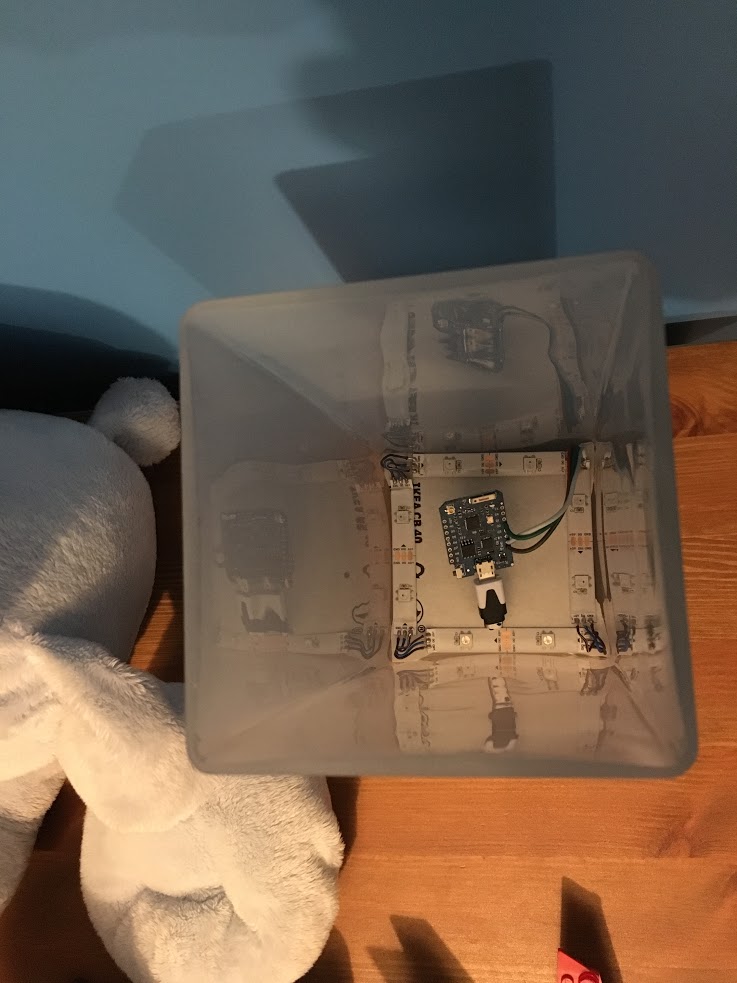
I found this cheap smart WiFi switch on one of my favourite Chinese sites: the Sonoff Basic:

Sonoff Basic

Sonoff Basic

And I thought: for a fiver, I’m not risking much, and it can supposedly be re-flashed with MQTT which I’ve grown found of recently (see Smart Christmas Baubles or Back-lit House Number if you want to know why).

Once received, I saw that indeed there was a header that could be used to flash the firmware. After a bit of search and from some of my readings on the Home-Assistant community site, I settled on the Tasmota firmware.

Now I have to say, at first the Tasmota Github website is quite daunting and complex, bit of a case of too much information kills information, but I eventually managed to get through it.

As I’m using Arduino IDE, I’ll trace the steps I had to follow in case someone else like me is a bit stuck.

First of all, I had to solder header pins on the Sonoff board to connect it to a PC and upload the new firmware. You’ll find everything you need to know in here

Then there were a few things that I had to do aside from downloading the code off Github. Now I have to plea guilty a bit as I simply downloaded the latest version and tried straight away. I say “guilty a bit” as it wasn’t obvious at first that there were more steps to follow when using Arduino IDE. So it’s worth following them else you may get the same error as I did: `MQTT_MAX_PACKET_SIZE is too small in libraries/PubSubClient/src/PubSubClient.h, increase it to at least 1000`

So here is the info: Arduino IDE

Once all that is done, flashing is a bit of a breeze (though I had to swap the RX and TX connectors on my 3.3V FTDI USB-to-Serial Programmer else it would fail to connect)

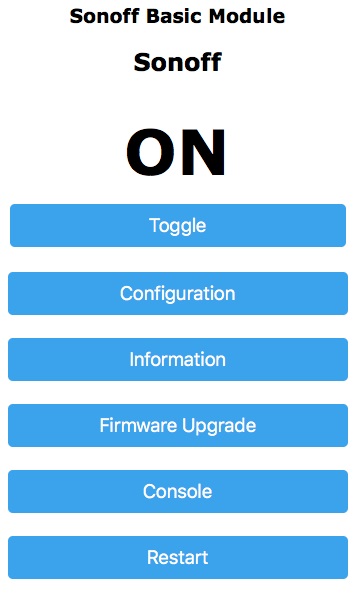
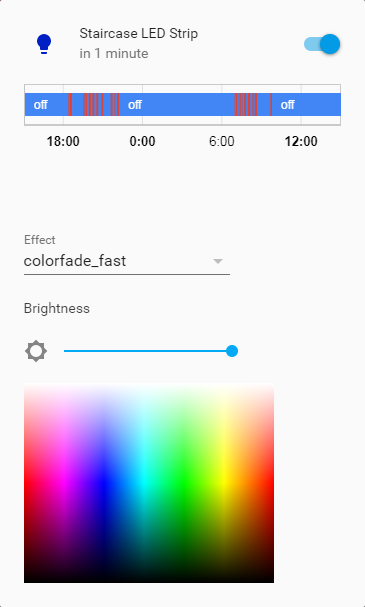
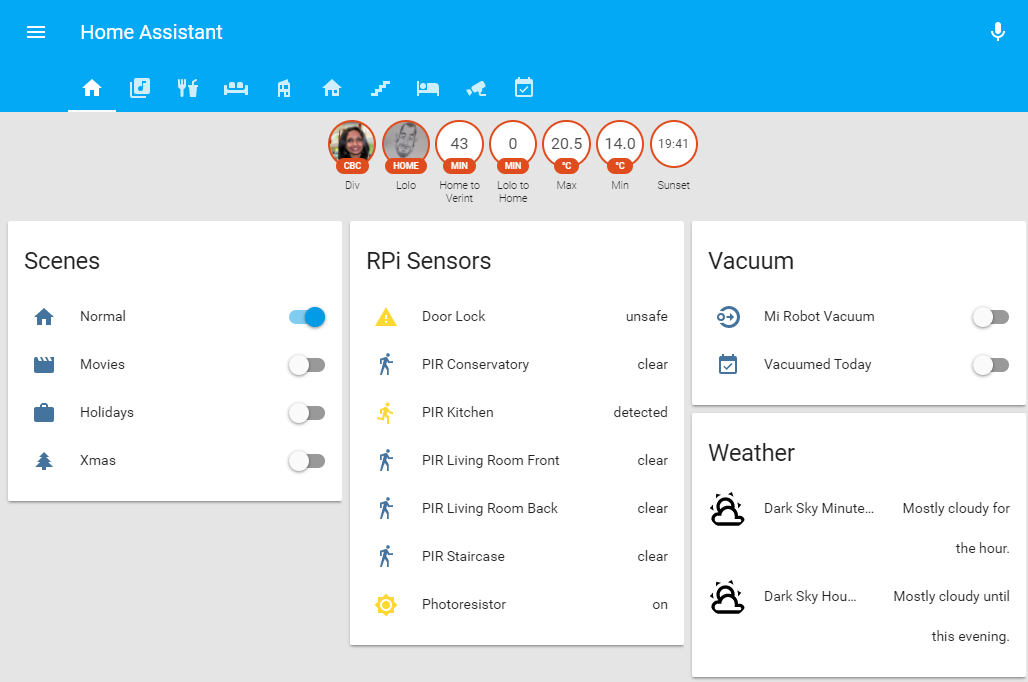
Once flashed, it was very easy to add it to Home-Assistant, especially when following info from the Github

Best of all is the control page when browsing to the Sonoff’s IP address:
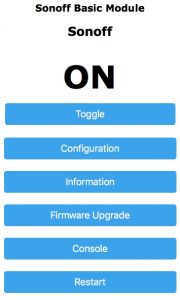
Tasmota

Tasmota

I will definitely get more of these switches at this price.

My next project will be to add a DHT12 to it as it’s possible to wire one directly to the GPIO14 (on the header so easy) to add temperature and humidity data…


Xiaomi Dafang Camera

I’ve recently purchased a Xiaomi Dafang Camera from GearBest. Why? Well it was cheap, 1080p resolution and has Pan-Tilt functionality as well as audio recording.

Xiaomi Dafang

Xiaomi Dafang

A couple of let downs however:

  1. The camera did not offer any RTSP streaming functionality (so not possible to use motion)
  2. The camera uploads the video feed to some server in China for the Xiaomi Mi app to retrieve

Not happy with either of the above, I started to look around for a solution and Elias Kotlyar managed to hack it to provide exactly what I was after.

I now have a camera that behaves like a “normal” CCTV camera via motion. I’ve also created a switch in Home-Assistant so as to enable motion detection video recording only when nobody’s home. Check my github page for more details.

In addition to the aforementioned standard features, Elias offered manual control of the LED so I can use this as a quick way of showing the camera status (on, off, motion recording enabled) My short term goal is to add MQTT to the camera to make it easier to control the LED and potentially the motors to pan & tilt. Longer term goal would be to get motion to control the pan-tilt functionality automatically. But that is likely to be a much more complex problem to solve, especially since motion documented that feature as “permanently at the experimental stage“…

The camera is however so good and cheap that I already bought another one 🙂

Watch this space…


Smart Christmas Baubles

Thanks to Gosse Adema and his instructable, I’ve also created smart Christmas baubles.

I currently have 3 baubles that I’ve connected to Home-Assistant, and I made some amendments to Gosse’s code to add MQTT Support (inspiration and code taken from corbanmailloux.)

You can get a copy of my code on my github page.

Here are some pics of my baubles:

Bauble1

Bauble1

Bauble2

Bauble2

Bauble3

Bauble3

Merry Christmas 🙂


CurrentCost Script

Until now I used DomotiGa to get the date off my CurrentCost EnviR energy sensor.

Since I’ve moved all my automations to Home-Assistant, the only bit that was not supported by HA was the CurrentCost device. I didn’t want to run DomotiGa just to get the data off the EnviR and then send it to HA via MQTT.

I’ve finally finished a script thanks to Robin Wilson that gets the EnviR data from the serial port and sends it to HA. DomotiGa can now truly rest in peace.

The final script is this one:

#!/usr/bin/python
# -*- coding: utf-8 -*-

import untangle
import serial
import json, requests, simplejson

def get_data(port='/dev/ttyUSB1', verbose=False):
	"""port: the port that the CurrentCost meter is attached to. Something like /dev/ttyUSB0 or COM1
	Returns:
	(sensor, temperature, usage), with sensor as the number of the interface a device is assigned to, temperature in degrees C, and usage in Watts
	"""
	ser = serial.Serial(port, 57600)
	xmldata = ser.readline()
	if verbose:
		print(xmldata)
	ser.close()
	p = untangle.parse(xmldata)
	temperature = float(p.msg.tmpr.cdata)
	watts = int(p.msg.ch1.watts.cdata)
	sensor = int(p.msg.sensor.cdata)
	return [sensor, watts, temperature]

def HA_API_State(Device_Id, Value, Unit):
	#https://home-assistant.io/developers/rest_api/#post-apistatesltentity_id
	url = "http://192.168.0.24:8123/api/states/" + str(Device_Id) + "?api_password=SECRET" 
	data={"state":"" + str(Value) + "", "attributes": {"unit_of_measurement": "" + str(Unit) + ""}}
	headers = {'Content-type':'application/json', 'Accept-Encoding': 'text/plain', 'Accept': 'text/plain'}
	r = requests.post(url, data=json.dumps(data), headers=headers)
	c = r.content
	result = simplejson.loads(c)

Temperature = 0
Sky = 0
Dehumidifier = 0
Total = 0

while(True):
	try:
		Temp = get_data()
		#print Temp[0]
		if (Temperature <> Temp[2]):
			print "Temperature: %s" % Temp[2]
			Temperature = Temp[2]
			HASS_API_State("sensor.CurrentCost_Temperature", Temperature, "°C")
		if (Temp[0] == 1):
			if (Total <> Temp[1]):
				print "Total: %s" % Temp[1]
				Total = Temp[1]
				HASS_API_State("sensor.CurrentCost_Power", Total, "Wh")
		if (Temp[0] == 2):
			if (Dehumidifier <> Temp[1]):
				print "Dehumidifier: %s" % Temp[1]
				Dehumidifier = Temp[1]
				HASS_API_State("sensor.Dehumidifier_Power", Dehumidifier, "Wh")
		if [Temp[0] == "9"]:
			if (Sky <> Temp[1]):
				print "Sky: %s" % Temp[1]
				Sky = Temp[1]
				HASS_API_State("sensor.CurrentCost_Sky", Sky, "Wh")
			
	except:
		pass


H801 LED Strip Controller Upgrade

While I’m perfectly happy with the H801 LED Strip controller’s abilities, there were a few niggles that I didn’t like:

  • The controller would always advertise as an access point, allowing “anyone” to connect as long as they knew the default SSID password (88888888)
  • Communication is 1 way with no feedback
  • The script I wrote to go through the colour spectrum was ran off the server and basically sending a command to the H801 over the WiFi network every 0.1 sec
  • I had to create an on/off switch as well as 3 sliders to select the (RGB) LED colour

Knowing the H801 is based on the ESP8266 chip and programmable, I looked for a better solution and finally settled on corbanmailloux solution for the following reasons:

  • The H801 is no longer an access point, making it more difficult to hack
  • it’s MQTT “enabled” and offers 2 way communication
  • It’s Home-Assistant compatible, and already includes support for RGB attributes via a colour picker and other effects
  • It already has the function to loop through the colour spectrum; actually it has 2 of them at different speeds, plus the possibility to time colour transitions and a flash feature, for notifications for example
MQTT JSON Light on Home-Assistant

MQTT JSON Light on Home-Assistant

I used the code off the mqtt_esp8266_rgb folder. The only things I had to change in config.h were:

  • LED colour pins to be compatible with the H801:
    #define CONFIG_PIN_RED 15
    #define CONFIG_PIN_GREEN 13
    #define CONFIG_PIN_BLUE 12
  • change the WiFi settings and the MQTT settings

Because I use cloudmqtt, I also changed the MQTT port in the main `mqtt_esp8266_rgb.ino` file:

client.setServer(mqtt_server, 16306);

I followed the instructions on corbanmailloux git page to install Arduino and the relevant libraries, and I used the esptool from micropython to upload the firmware


Goodbye DomotiGa, Long Live Home-Assistant

Following what I think is due to a general OS update, SmartVISU no longer connects to DomotiGa. I’ve tried to fix it, but I’ve thought for a while now to transfer everything over to Home-Assistant since support for IoT devices is much better and update are a lot more frequent

So I’ve finally taken the plunge. One of the main hubs that was used in DomotiGa was the RFXTrx433 Transceiver. I’ve disconnected it from DomotiGa and added it to Home-Assistant. I’ve spend the best part of 2 weekends and several weekday evenings recreating the devices and events that were in DomotiGa.

Home-Assistant Main Page

Home-Assistant Main Page

There’s still a lot of work to be done, but I’ve done the most important bits. I’ve also broken down the content on several pages unlike cramming almost everything in one page like I did in SmartVISU.

I’ve also used this an opportunity to save my config to GitHub for back up and in case it helps someone else.

The only thing I’ll be missing as not built-in is the data from my CurrentCost Sensors, but I’ll be running a light version of DomotiGa to send that data to my Home-Assistant setup.