How to choose the right CCTV Security Camera

Having trialled “DIY” cameras (using a Webcam taped to the window, or a smartphone taped to the window), I am now looking for a proper solution for my CCTV needs.

I have spent a fair amount of time looking at various cameras and options, and I thought I’d share my findings in case someone else finds it useful.

Points to consider when buying a CCTV camera:

  1. IR Cut Filter
    1. You probably need a camera with an IR Cut Filter to cut IR light during day time, see below the difference.
    2. Some colours are more prone to becoming purple without an IR Cut filter
  2. Lens Size
    1. The biggest problem with CCTV installations is that the wrong lens is chosen. This normally results in people being too small to recognise and with CCTV pictures only being around 40k each, and not the 10 million you get on your photo camera, you cannot electronically zoom in. To be able to recognise a 1.7m person on a standard* CCTV system they must be at least 50% height of screen.
    2. Use the below links to calculate the lens size, or get a vari-focal camera that allows you to adjust the lens size.
      1. http://www.cctv-information.co.uk/i/Choosing_the_Wrong_Lens
      2. http://polarisusa.com/lens-calculator
      3. https://www.pelco.com/partners/tools-calculators/camera-lens-field-of-view-calculator-fov
  3. Resolution
    1. If you want to catch someone’s face or be able to read a number plate, you’ll need a higher resolution, especially if what you’re pointing at is far. Note however that the higher the resolution, the bigger storage space you’ll need. Realistically you’d need at least a Full HD camera so probably looking at a minimum of 2 or 3MP camera.
  4. Position
    1. If you plan on setting your cameras outside, you need to make sure they will withstand the elements. Look for IP66 rated camera
    2. The next thing to consider is how you’re going to power your camera. Even if you were to opt for Wireless cameras (I strongly recommend you don’t), they still need to be powered. I’m opting for a POE (Power Over Ethernet) camera. This means the camera is powered by the network cable, thus saving me having to run power cables to the camera (and sorting loads of extra sockets in a safe place). It also means it’ll reduce interferences due to the data and power cable being potentially too close to each other.
  5. Form Factor
    1. Do you want a dome or bullet form factor?
      Dome is less likely to be knocked off by a burglar (esp. vandal proof versions). Another positive point is that wind won’t make it shake. However depending on the installed position, you may see rain drops that would trigger motion detection. My personal reason though is you won’t see cob web on your videos during night recordings (Spiders have a knack for putting webs on Bullet CCTVs because they generate a bit of heat and are usually nicely placed to catch flies)
  6. PTZ Cameras (Pan-Tilt-Zoom)
    1. These are nice as you can manually change where the camera points at, but realistically you’d either need a compatible application that will control the PTZ movement based on motion detection, or need to set the camera so that it constantly pans back and forth. Personally I can’t see the extra price justification for this unless you have a very wide area to monitor
  7. Night monitoring
    1. Depending on where you want to monitor, if you need night vision you can either chose a camera with IR LEDs (giving you a black and white picture at night), purchase a separate IR flood light (meaning you only buy a standard camera, the IR flood light will provide night IR light based on a photo sensor or movement sensor (PIR). You can always get a regular flood light that will just switch on with movement. LED ones are a bit more pricey but save you money on the long run as they need less power, this is especially interesting if you’re pointing at a busy area like kerb in town
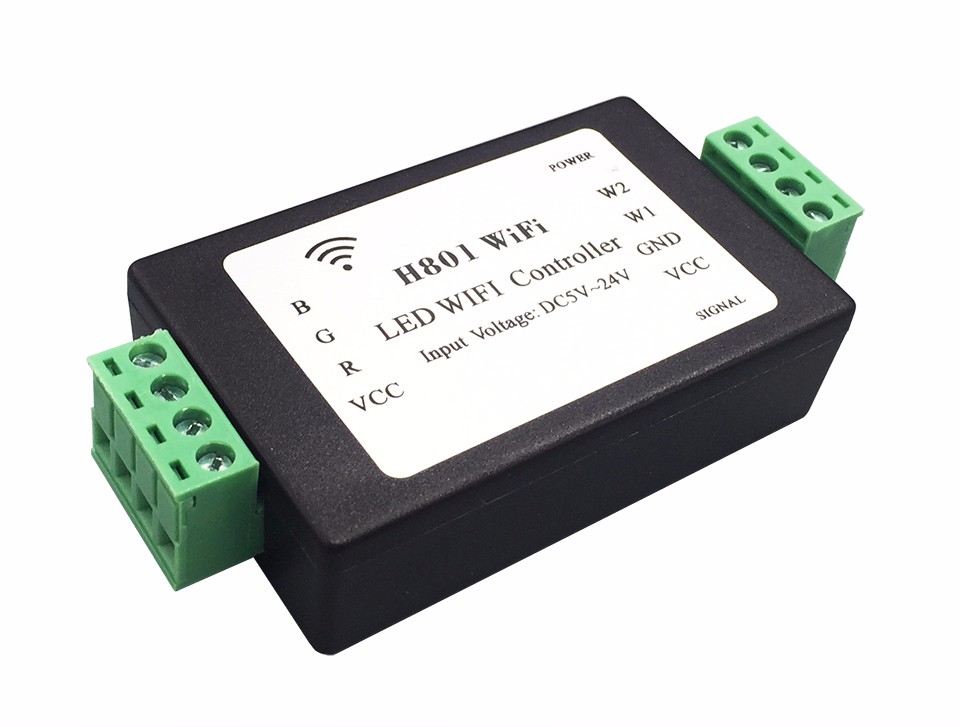
  8. Wireless or Networked, POE?
    1. I personally would not recommend WiFi cameras. They are prone to signal drops and interferences, meaning you’ll end up with green squares / lines every so often which could come at a crucial moment. They can also be hacked or at least made inefficient if targeted by a Wifi jammer/scrambler.
    2. In addition, you will most likely have to drill a hole through the wall if the camera is fixed outside, you may as well run a network cable. If indeed the camera is placed outside, the power adapter connector can be much bigger than the cable itself, requiring a fairly big hole to pass it through.
    3. With this in mind it’s better to opt for a POE (Power Over Ethernet) camera and your hole is the diameter of your cable (you cut the cable to pass it through, then crimp a network connector to plug into the camera). POE will mean a single cable providing power and network connection. It does require a POE switch or at least a POE injector. Depending on how many cameras your setup will be made of, a POE switch might make more commercial sense.
  9. Where to record the videos?
    1. While many CCTV providers and website will try and sell you an NVR (Network Video Recording) device, I personally opted for a camera with a built-in SD card. The video gets recorded on the SD Card, thus decluttering the network and removing potential bottlenecks, while remaining accessible via the network. It also means that should the worst happen, it’s unlikely that the evidence will be stolen: it’s easy to take the NVR box away, much harder to climb up the wall, open the camera and get the SD out or take the camera altogether.
    2. And before you ask, a decent camera will reuse the card once filled, so you don’t run out of space, meaning once the card is full, the older video is deleted to make space for the newer one. The amount of videos recorded (or how far back in time you can go) is only limited by the size of the SD camera. I find my  128GB SD Card on my 4MP camera gives me ~1 month worth of data when only recording motion detected videos (e.g. no 24/7).
    3. You can still use the camera feed for live monitoring. And since most recent cameras offer dual channel, you can use the full resolution to record on the SD card and use a lower resolution for live monitoring so once again you don’t use all your network bandwidth.
  10. Which software to use?
    1. Well this is the million dollar question. Depending on where you save the videos, you may have to use the camera manufacturer’s software (usually browser based application) or you can use third party application that take the video feed in and then perform analysis on it (like motion detection, face recognition etc.). Some manufacturers will also provide an app for your smartphone. I personally use motion which is a good free Linux application. And with a simple web page, you can have a live feed on you computer or smartphone. There are plenty of alternative software options out there if “motion” is not your cup of tea.
  11. Additional guides on how to choose a CCTV based on your needs
    1. http://topcctvcameras.co.uk/buyers-guide-home-cctv-cameras-2015/
    2. http://www.wikihow.com/Choose-a-Suitable-Security-Camera


LED Strip Lights

For a while now I’ve been wanting to add some LED Strips to my setup.

I wanted to get colour changeable strips that I could remotely control via DomotiGa.

I ended up getting 2 controllers based on the customisable H801 chip from AliExpress:

H801

H801

The downside is that I needed an Android Phone to set it up (Connect to my WiFi network), but once done, I no longer need the Android Phone.

In the future I’ll update the firmware to customise it and make it more secure, but for now it works relatively easy.

With advice taken from this post, I managed to create a simple script to send commands to the controller:

sendip -p ipv4 -is 192.168.4.15 -p udp -us 30978 -ud 30977 -d 0xfbeb000000000079979d00 -v 192.168.4.131
  • The first IP address is the address the command is sent from
  • The second IP address is the address of the H801 controller
  • The actual command is made of several parts: 0xfbeb 0000000000 79979d 00:
    • 0xfbeb is constant
    • Next come the hex values for the colours R G B W1 W2 (0000000000)
    • Then comes part of the controller’s MAC Address, in reverse order. The MAC Address is 18:fe:34:9d:97:79
    • The last bit (00) is again constant

This simple method allows me to easily switch the strip on and off and change its colour, and the results are quite impressive:

LED Strip Under TV Cabinet

LED Strip Under TV Cabinet

LED Strip Staircase

LED Strip Staircase


Because I have 2 controllers, I wanted to use a single script and parse as an argument the controller number that I wanted to communicate with.

The end result is the below script:

#!/usr/bin/python
# -*- coding: utf-8 -*-

import time
import sys
import subprocess

LEDStripBase="echo PASSWORD | sudo -S sendip -p ipv4 -is 192.168.0.24 -p udp -us 30978 -ud 30977 -d 0xfbeb"
LEDStrip1="000063509900 -v 192.168.0.40 > /dev/null"
LEDStrip2="000091559900 -v 192.168.0.41 > /dev/null"
# Kill the Xmas script if running
cmd="echo PASSWORD | sudo -S pkill -9 -f LEDStripXmas"
ps = subprocess.Popen(cmd, shell=True)
time.sleep(0.1)

if(len(sys.argv[2])==1):
	MyParam2 = "0" + hex(int(sys.argv[2]))[2:]
else:
	MyParam2 = hex(int(sys.argv[2]))[2:]

if(len(sys.argv[3])==1):
	MyParam3 = "0" + hex(int(sys.argv[3]))[2:]
else:
	MyParam3 = hex(int(sys.argv[3]))[2:]

if(len(sys.argv[4])==1):
	MyParam4 = "0" + hex(int(sys.argv[4]))[2:]
else:
	MyParam4 = hex(int(sys.argv[4]))[2:]

try:
	if(sys.argv[1] == '1'):
		cmd = LEDStripBase + MyParam2 + MyParam3 + MyParam4 + LEDStrip1
		ps = subprocess.Popen(cmd, shell=True)
	if(sys.argv[1] == '2'):
		cmd = LEDStripBase + MyParam2 + MyParam3 + MyParam4 + LEDStrip2
		ps = subprocess.Popen(cmd, shell=True)

except:
	pass

Note: I only soldered the RGB and Vcc pins as I’m not looking to use the white channels, hence the hard coded 0000 in the above script

All I need to do now to change the colour [to purple on the 1st controller) is to call the script as follows:

LEDStrip 1 255 0 255


Now to take it to the next level, I created a separate script to slowly run through the colour spectrum. I mainly run it at Christmas so called it LEDStripXmas.py (hence the command in previous script to kill this one if running):

#!/usr/bin/python
# -*- coding: utf-8 -*-

import time
import sys
import subprocess

LEDStripBase="echo PASSWORD | sudo -S sendip -p ipv4 -is 192.168.0.24 -p udp -us 30978 -ud 30977 -d 0xfbeb"
LEDStrip1="000063509900 -v 192.168.0.40 > /dev/null"
LEDStrip2="000091559900 -v 192.168.0.41 > /dev/null"

colors=[255,0,0]
while(True):
	# Cycle through RGB Spectrum
	colors[0]=255
	colors[1]=0
	colors[2]=0
	for decColour in range(0,3,1):
		if(decColour == 2):
			incColour = 0
		else:
			incColour = decColour + 1
		for i in range(0,255,1):
			colors[decColour] = colors[decColour] -1
			colors[incColour] = colors[incColour] +1
			R = hex(colors[0])[2:]
			if(len(R)==1):
				R = "0" + R
			G = hex(colors[1])[2:]
			if(len(G)==1):
				G = "0" + G
			B = hex(colors[2])[2:]
			if(len(B)==1):
				B = "0" + B
			if(sys.argv[1] == '1'):
				cmd = LEDStripBase + R + G + B + LEDStrip1
			else:
				cmd = LEDStripBase + R + G + B + LEDStrip2
			ps = subprocess.Popen(cmd, shell=True)
			time.sleep(0.1)

For the below movie, I’ve reduced the wait time (normal cycle takes about 1 min)

I then added the strips as devices in DomotiGa.

They are added as virtual devices, with Value1 being the strip’s status (on|off) and values 2,3,4 carrying the decimal value of the R G B colours respectively:

LED Strips - DomotiGa

LED Strips – DomotiGa

Then all I had to do is to call an action when one of the values of the device changes:

LEDStrip.py 1 <$188|2$> <$188|3$> <$188|4$>

And finally in SmartVISU I added a device:

LED Strip SmartVisu

LED Strip SmartVisu

Clicking on the colour brings the colour picker:

ED Strip SmartVisu Colour Picker

ED Strip SmartVisu Colour Picker


Repurposing an old LCD TV into an interactive wall calendar

Now that I’ve upgraded the living room TV, I’ve moved my old 42” Plasma into our bedroom and I’m now left with a spare 22′ LCD TV.

Until now we had an old school paper wall calendar, mainly for birthdays and anniversaries, but let’s be honest we don’t look at it that often as it’s pretty much static (albeit with the monthly page flip)

I’ve stumbled upon DAKBoard and decided to repurpose my old tv into an interactive wall Calendar.

It’s free to sign up and create your own dashboard. I set up a family calendar in Google, set my location for the weather, and changed the picture setting to pull the live feed from my CCTV.

First I bought a Raspberry Pi Zero W as the “brain” of the new calendar. It would really only be opening the DAKBoard site and that’s pretty much all. No need for a big Raspberry Pi.

Then I installed Raspbian Jessie on it, mounted it so I could edit the WiFi settings thanks to David Maitland’s post. (I have no micro USB to USB adapter so no way of interacting with the Raspberry Pi other than via WiFi, which needs setting up manually).

Once connected to WiFi, I SSH’ed on it to setup the usual VPN (I use TightVNC, not the built in VNC server) and Samba.

Now it’s time to set up DAKBoard to open automatically at startup:

  1. Edit /home/pi/.config/lxsession/LXDE-pi/autostart and add this line. (replace ########### with the key from DAKBoard under Account):
    @chromium-browser --disable-session-crashed-bubble --disable-infobars --incognito --kiosk http://dakboard.com/?p=###########


  2. install unclutter to hide the mouse:
    sudo apt-get install unclutter


  3. Disable screen blanking so the TV always shows the dashboard:
    sudo nano /etc/lightdm/lightdm.conf

    insert the below line in the [SeatDefault] block:

    xserver-command=X -s 0 dpms


  4. Disable the screensaver
  5. I then use DomotiGa and one of my LightWaveRF sockets to switch the TV on and off based on motion detection on my PIR
DAKBoard

DAKBoard

In the future I might look into dismantling the TV to get it to fit into a custom frame as per this instructable

[17th March 2017]

If you also plan on using VNC, there’s a chance that DAKBoard launched on the VNC display and not the HDMI display. If that’s the case, stop VNC from starting automatically. With my setup I set:

sudo systemctl disable [email protected]

(see this post for more info on how to setup TightVNC)

Then I simply added a line in /home/pi/.config/lxsession/LXDE-pi/autostart :

@nohup vncserver :1


Syncing Home-Assistant.io and DomotiGa

Having tried Home-Assistant I can see how it can be really powerful once setup (and that’s probably where the issue lies, configuration is too much code driven with no UI at all).

However there are devices that are not yet supported by Home-Assistant (e.g. CurrentCost) and in addition, I can’t have both Home-Assistant and DomotiGa connected to my RFXTrx.

This means I’m looking to use both platforms and find a way to get them to talk to each other.
I already know how to send commands/updates to DomotiGa via JSON-RPC so that will be my first approach.

I’ve created a simple shell command that I use to update devices in DomotiGa:

shell_command:
  set_domotiga: curl -sS -X POST -H "Content-Type:application/json" -H "Accept:application/json" -d '{"jsonrpc":"2.0", "method":"device.set", "params":{"device_id":{{device_id}}, "valuenum":"{{valuenum}}", "value":"{{value}}"}, "id":122}' 192.168.0.24:9090

then in my automations, I call this function with the correct parameters. See below example for my Nest Thermostat (virtual) Device on DomotiGa:

- alias: Update Nest Status
  trigger:
    - platform: state
      entity_id: sensor.hallway_thermostat_hvac_state
  action:
    - service: shell_command.set_domotiga
      data_template:
        device_id: 122
        valuenum: 2
        value: '{{states.sensor.hallway_thermostat_temperature.state}}'

I’ve also tried to install Home-Assistant on my Raspberry Pi as I do like the Web interface, but it’s overkill and take too much overhead when I only need to monitor my GPIO ports. My own script is better in that effect.


Controlling a Sky+HD box

Now that I can reasonably control my TV and my AV Amplifier, I wanted to check whether I could also control my Sky+HD box for further automation (e.g. switch the box off if I switch the TV Off).

Sky+HD Box

Sky+HD Box

After little research I stumbled upon a repository from dalhundal that could do almost exactly that. Only issue at the moment is that this is pretty much a one way function, just like using a physical remote control: I can send commands but don’t receive a status back.

I then added a simple Shell Actions in DomotiGa to send the on/off command:

sky-remote-cli 192.168.0.40 power

and the TV Guide button:

sky-remote-cli 192.168.0.40 tvguide


Next step is to look at this page to see if I can retrieve the box’s status.

[2018-03-02 edit]

Above link doesn’t appear to move too much and I found a workaround. Check this page for more…


Onkyo TX-NR656 AV Amplifier

With the recent TV upgrade (see this post) I also upgraded my AV Amplifier.

My old Denon was nice but without any HDMI port, it means I needed lots of cables, and I had an issue with the central speaker channel: I could hear a big “bang” noise every time I switched on, off, changed the source or the sound mode. Being 10 years old, it wasn’t worth getting it repaired.

So I upgraded to an Onkyo TX-NR656.

Onkyo TX-NR656

Onkyo TX-NR656

With all the latest features, I cut in half the number of cables at the back since video and audio go from the device to the amplifier via the HDMI cable.

And with ARC (Audio Return Channel), I don’t even need an audio cable from the TV to the amplifier if I watch a video that’s not connected to the amplifier (e.g. a movie off a DLNA server)

Another neat feature is that the amplifier is WiFi enabled, and can be controlled over the network.

DomotiGa supports the Onkyo, but the commands are still a bit sparse and somewhat buggy / not user friendly, so that’s a work in progress that I have with their team.

I have however discovered Home-Assistant.io which offers native integration with the Onkyo. More on this in the dedicated Home-Assistant post.


Home-Assistant.io

I’ve recently discovered Home-Assistant (https://home-assistant.io) which offers a manufacturer agnostic home automation platform.

I’m still in in the learning curve and will post here what I’m doing with it. Watch this space.


[15th Feb 2017]

The good news first:

  • The web interface looks really good and easy to interact with.
  • There is also a huge list of supported devices and platforms, including the much wanted Nest for me.
  • The install is quick and painless

Now for the not so good:

  • I have spent hours trying to achieve some of the most very basic tasks (add a device, add a simple automation) because there is no graphical UI for this, it’s all code driven.
  • Some of the devices that I use (e.g. CurrentCost) are not supported

So all in all, I’m not going away from DomotiGa just yet, but will most likely try and get both platforms to talk to each other to get the best of both worlds.

I’ll try and post some config and UI examples in the near future


[16 Aug 2017]

Home-Assistant gets updated every other week and already since I started using it, loads of components have been added thanks to its massive community.

The GUI has also been updated to now allow creation of automations with minimum coding required, so I’m now seriously thinking about switching over from DomotiGa to Home-Assistant. This is even more prevalent since SmartVISU doesn’t appear to connect to DomotiGa since the last apt-get upgrade a couple of weeks ago, which is a shame as I really grew fond of the design.


Panasonic Smart TV

I’ve finally upgraded my TV. My previous 42” Plasma was very nice, but only HD ready (so 720p) and not smart.

I’ve now got a 4K 58” Panasonic TX58DX700B which has the advantage of having a network interface.

Panasonic Viera TX58DX700B

Panasonic Viera TX58DX700B

And the bonus is that there is already a plugin in DomotiGa that supports Panasonic Viera TVs.

This means I can now receive the mute status (on/off) and the TV volume, but more important I also get the TV status (on/off) and I can switch off the TV from DomotiGa.

This is very handy for my home automation, i.e. dim the lights when the TV in on, and don’t switch the lights off if there is no motion detected on the PIRs AND the TV is on.


Nest Thermostat

My old “dumb” thermostat packed up while doing some redecorating, so I upgraded to a smart one: the Nest Thermostat:

Nest Thermostat 3rd Gen

Nest Thermostat 3rd Gen

One of the cool features of this thermostat is that it can be remotely controlled via the web (http://home.nest.com) or via an app on a smart phone.

Now what would be even better is if I could integrate this with the rest of my home automation setup. And so I went looking online for ways to connect with the intent of 1) extracting data such as temperature and humidity and 2) control the target temperature remotely from DomotiGa.

My first connection attempt was via gboudreau’s unofficial API on GitHub

Although it works perfectly fine, there is some sort of limit on the number of times you can poll the info and eventually the connection gets closed.

I then looked at Google’s official API, and I’ve even followed their tutorial and managed to connect to my Nest, but it’s a little bit too much out of my area of expertise, plus I think the Google codelabs example is intended to be ran on mobile devices rather than a simple web interface. So for now I’ve parked this project for later.

[26th Jan 2017]

Edit: home-assistant.io supports Nest natively, using Google Nest official API. I’m currently working through integrating my Nest with home-assistant.io and get it to talk to DomotiGa. Watch this space.


LCD 3D Printed Custom Case

I’ve had my LCD Display screwed against a badly made piece of wood just so I could attach it to the wall.

After looking for a case for the display, I stumbled upon Thingiverse where “mmontee” had already done all the hard work. I headed over to 3DHubs and found a printer who did the job for me quickly and at a reasonable price.

I opted for a white case as I thought the display would stand out even more.

The printed case looks like this:

LCD Case Back Inside

LCD Case Back Inside

LCD Case Back Outside

LCD Case Back Outside

LCD Case Front Inside

LCD Case Front Inside

LCD Case Assembled

LCD Case Assembled

Case with LCD Fitted

Case with LCD Fitted